Core workout for beginners at home: six moves, no equipment
A beginner core workout at home with no equipment: six moves, two rounds, sets and rest times, animated demos, and when to make each exercise harder.
revns editorial · Published November 18, 2026 · 9 min read
Beginner core at home: cat-cow warm-up, then dead bug, bird dog, glute bridge, plank and side plank for 2 rounds. WHO counts it as strength work 2+ days a week.
A core workout for beginners at home needs no equipment: warm up with cat-cow, then cycle dead bugs, bird dogs, glute bridges, a forearm plank and a side plank for two rounds, resting 30 to 45 seconds between moves. The session takes about fifteen to eighteen minutes and suits anyone who can get on and off the floor safely. Train it two or three days a week with at least one rest day between hard sessions. Every move below has a moving demo from the exercise library.
TL;DR
| Move | Prescription | Rest |
|---|---|---|
| Cat-cow (warm-up) | 8 slow reps | — |
| Dead bug | 8–10 per side | 30–45 s |
| Bird dog | 8 per side | 30–45 s |
| Glute bridge | 10–12 | 30–45 s |
| Forearm plank | 20–30 s | 30–45 s |
| Side plank | 15–25 s per side | 60 s between rounds |
Two rounds total. About 15–18 minutes with warm-up.
Core workout for beginners at home: what should you expect?
Your core is not only the rectus abdominis (the “six-pack” muscle). It includes deep stabilisers, obliques on the sides, muscles along the spine and the glutes that help control the pelvis. A beginner routine should train bracing (resisting movement), anti-extension (stopping your back from arching), and anti-rotation (keeping the trunk still when arms or legs move), not hundreds of fast crunches.
The World Health Organization tells adults to do muscle-strengthening activity at moderate or greater intensity on two or more days a week, alongside aerobic work. Slow bodyweight core drills with good form count toward that target when effort is genuine, not when you rush through half reps.
This workout is training guidance, not a treatment for back pain. Some people with back issues tolerate bird dogs and bridges well; others need an individual plan from a physiotherapist or clinician.
How do you do this core workout?
Follow this order every session.
Session structure
- Warm-up (2 minutes): cat-cow on all fours, eight slow reps, breathing with each curl and arch.
- Round 1: dead bug → bird dog → glute bridge → forearm plank → side plank (each side). Rest 30 to 45 seconds between moves; 60 seconds after side plank before round 2.
- Round 2: repeat the same five moves. Skip round 2 in week one if your lower back or shoulders feel taxed.
- Cooldown (optional): lie on your back, knees bent, feet flat, and breathe slowly for one minute.
How often
Two or three non-consecutive days a week (for example Monday, Wednesday, Saturday). Core can sit on the same day as strength training for beginners after your main lifts, or on a rest day from heavy legs. See rest days: how many you need if you stack running, lifting and core without recovery.
When to progress
Move on when the last rep of each set still looks the same as the first (back flat on dead bugs, hips level in plank). Then either:
- add two reps per side or per set;
- add five seconds to each plank hold; or
- swap the easier option for the harder link under each move (for example longer dead-bug reach toward leg raises).
Change one variable at a time per week.
Warm-up rule
Never start with a long plank cold. Cat-cow wakes the spine; bird dogs and dead bugs then load the trunk in a controlled range. If your wrists hate kneeling, do dead bugs and bridges only in week one and add bird dogs when kneeling is tolerable.
The moves
Each block lists steps, dose, a common mistake and easier or harder options in the library.
1. Cat-cow
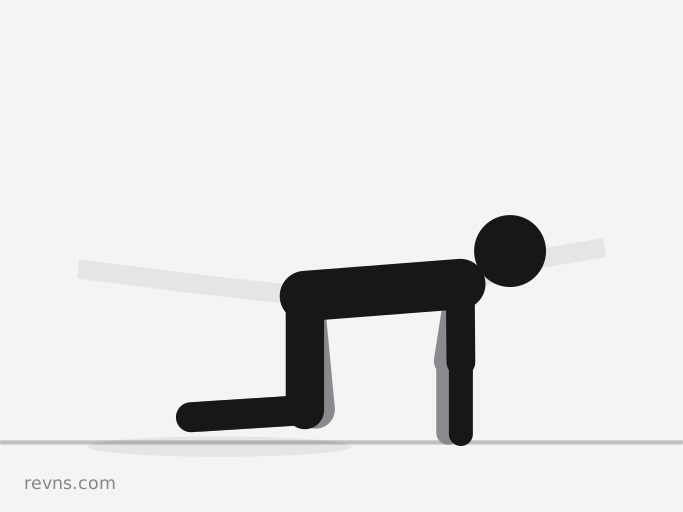
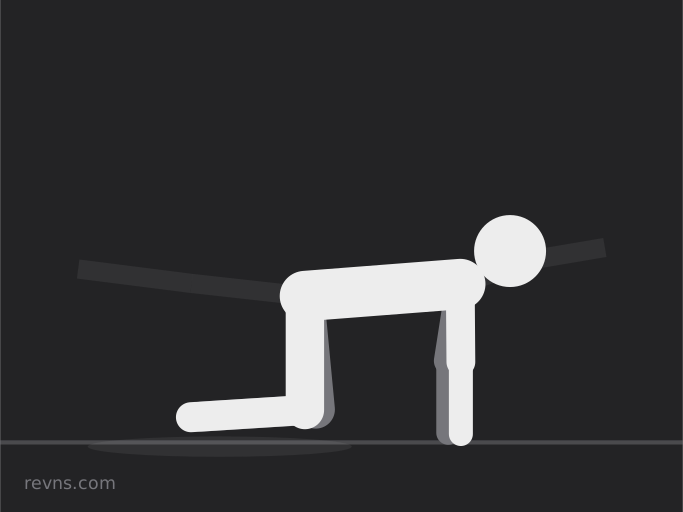
Cat-cow is a gentle warm-up for the spine and shoulders before you load the trunk on the floor. It is not part of the working rounds but belongs in every session.
- Kneel on all fours, hands under shoulders, knees under hips.
- Breathe in, drop the belly, lift the chest and tailbone (cow).
- Breathe out, round the spine, tuck the chin (cat).
- Move slowly; do not snap between poses.
- Repeat for eight controlled cycles.
Do: 8 slow reps before round 1. Move on when: you feel loosened through the mid-back, not when you feel dizzy. Common mistake: rushing the breath. Match one slow breath to each direction. Easier: smaller range. Harder: pause two seconds at each end.
2. Dead bug
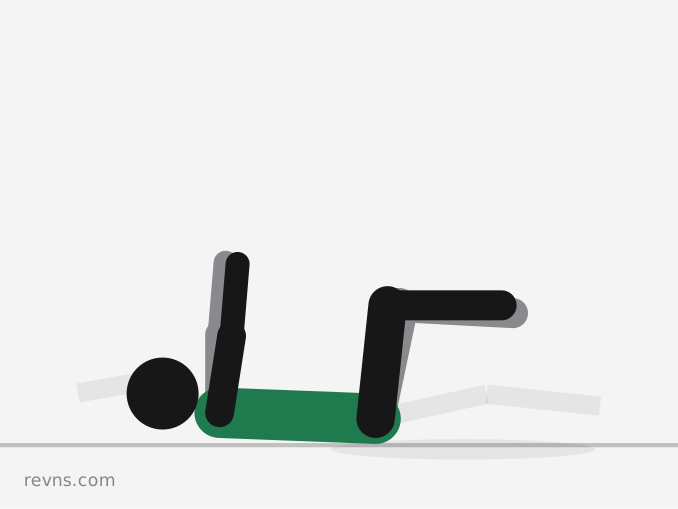
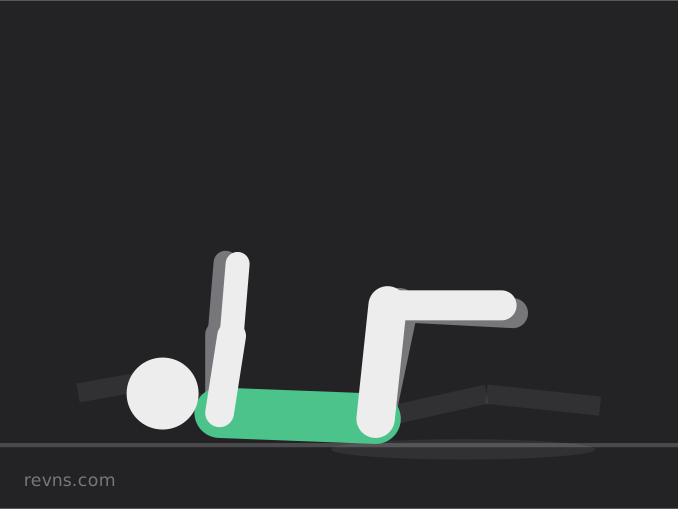
The dead bug teaches your deep core to keep the lower back down while opposite arm and leg move. It is one of the safest starting drills for anti-extension.
- Lie on your back, arms toward the ceiling, knees bent at 90 degrees over hips.
- Press your lower back gently into the floor.
- Slowly reach one arm overhead and the opposite leg toward the floor without the back arching.
- Return to the start and switch sides.
- Move as if through honey: about three seconds out, three seconds back.
Do: 8–10 reps per side, one round counts as both sides done. Move on when: 10 per side stay smooth for two sessions. Common mistake: arching the lower back as the leg lowers. Shorten how far the leg drops. Easier: crunches with feet on the floor. Harder: leg raises when the back stays down on every rep.
3. Bird dog
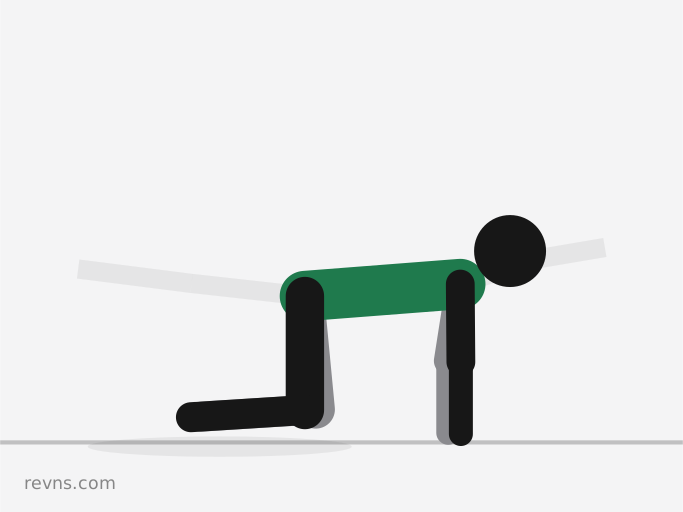
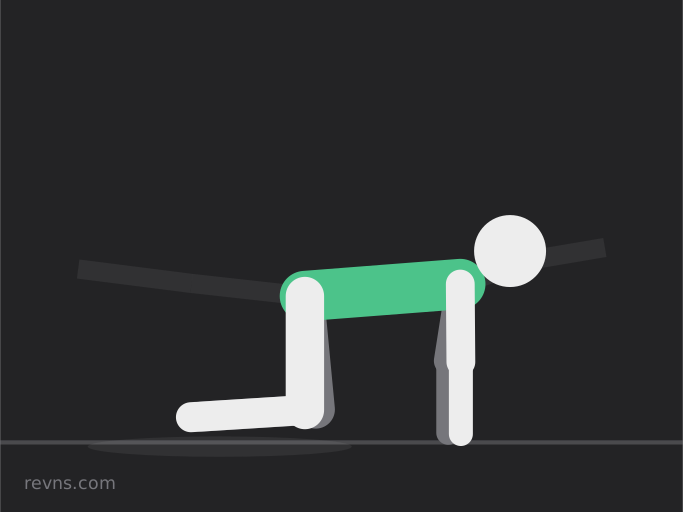
Bird dogs build balance and teach the hips and shoulders to stay square while one arm and the opposite leg reach. They complement dead bugs on all fours.
- Start on hands and knees, wrists under shoulders, knees under hips.
- Brace your stomach as if preparing for a light push.
- Reach one arm forward and the opposite leg back until both are level with your torso.
- Pause without rotating the hips, return, and switch.
- Imagine a full cup of water on your lower back — do not spill it.
Do: 8 reps per side. Move on when: hips stay quiet for the whole set. Common mistake: lifting the leg so high the back arches. Reach long, not high. Easier: cat-cow only, or reach one arm then one leg separately before combining. Harder: slower tempo or longer pause at full reach, then dead bugs with a longer limb reach.
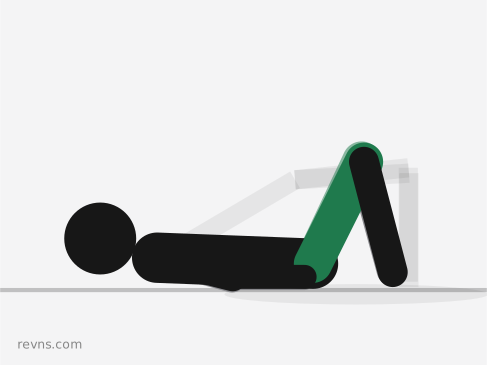
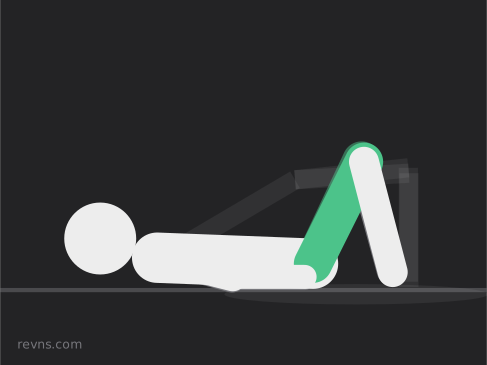
4. Glute bridge
Glute bridges train the back of the hips and help posterior core endurance. Strong glutes support a neutral pelvis in planks and running.
- Lie on your back, knees bent, feet flat hip-width apart, arms by your sides.
- Press through your heels and squeeze your glutes.
- Lift your hips until your body forms a straight line from shoulders to knees.
- Pause for two seconds at the top without arching the lower back.
- Lower under control.
Do: 10–12 reps. Move on when: 12 reps with a two-second squeeze feels easy for two sessions. Common mistake: pushing the ribs up and overriding the glutes. Tuck the pelvis slightly before you lift. Easier: bird dogs. Harder: single-leg glute bridges.
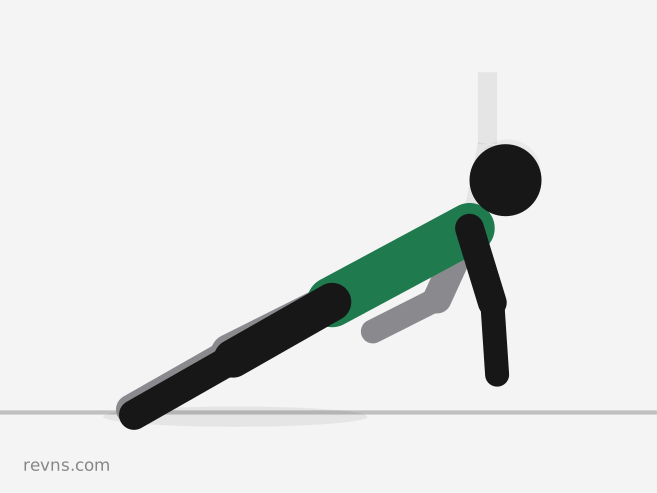
5. Forearm plank
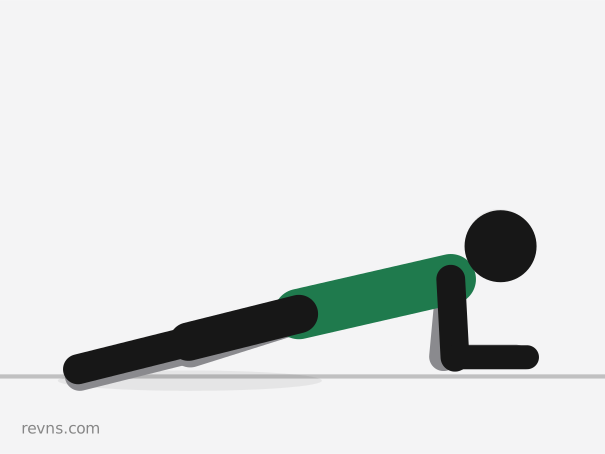
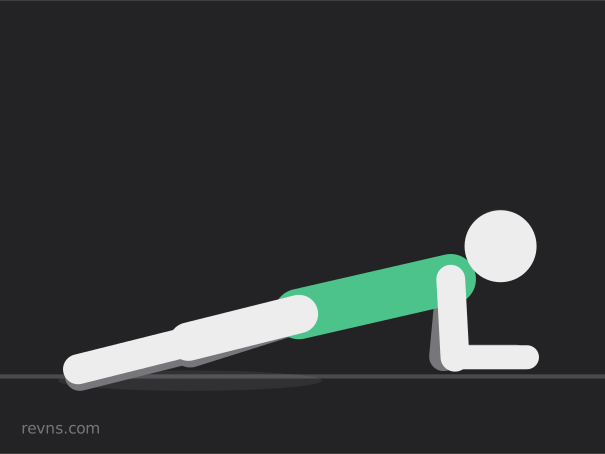
A forearm plank is an isometric anti-extension hold: your job is to stop the hips from sagging. Several short holds with good form beat one long shaky hold.
- Place forearms on the floor, elbows under shoulders.
- Step feet back so your body is one line from head to heels.
- Squeeze glutes and brace the stomach; push the floor away between your shoulders.
- Breathe in short steady breaths — do not hold your breath.
- End the set when hips sag or shoulders shrug toward ears.
Do: 20–30 seconds, up to 3 attempts if you rest 20 seconds between tries in the same set slot. Move on when: 30 seconds is steady for two weeks — add 5 seconds per week toward 45. Common mistake: hips piking up or dropping. Film one set from the side once a month to check. Easier: dead bugs. Harder: plank shoulder taps.
6. Side plank
Side planks load the obliques and the muscles that stabilise the pelvis side to side. Beginners can keep the bottom knee on the floor.
- Lie on your side, elbow under shoulder, legs stacked or knees bent with bottom knee down for an easier start.
- Lift your hips so your body forms a straight line from head to knees or feet.
- Rest the top arm on your hip or reach it toward the ceiling.
- Hold without letting the hips roll forward or sink.
- Switch sides.
Do: 15–25 seconds per side. Move on when: you can hold 25 seconds per side with hips high for two sessions — try straight legs. Common mistake: shoulder collapsing toward the ear. Push the floor away with the bottom forearm. Easier: bent bottom knee on the floor. Harder: side plank hip dips.
What muscles does this core workout work?
| Move | Main emphasis |
|---|---|
| Dead bug | Deep abdominals, anti-extension |
| Bird dog | Spine stabilisers, glutes, shoulders |
| Glute bridge | Glutes, hamstrings, posterior pelvis |
| Forearm plank | Full anterior core, shoulders |
| Side plank | Obliques, lateral hip stability |
Crunches and bicycle kicks are optional extras later. Beginners gain more from bracing and control than from high-rep flexion that strains the neck. If you want rotation work after four weeks, add slow bicycle crunches or heel taps on a third core day, not inside every session.
How is this different from the videos and lists you see online?
Many ranking pages for “core workout for beginners at home” either rely on follow-along videos (hard to check your own form), use 40-second HIIT intervals with ten exercises and almost no rest coaching, or sell gear you do not need on day one. This guide stays on six named moves with:
- Move-on rules per exercise so you know when to add reps or time;
- Easier and harder links to standalone pages in the library, not vague “make it harder” lines;
- Breathing called out on planks and dead bugs, because breath-holding raises blood pressure and hides a weak brace;
- Two rounds, not an arbitrary “burnout” fourth round when form fails.
If you already do calisthenics for beginners, run this circuit on a light day or after push-ups when planks still feel shaky — the same plank skill carries into every push-up.
What should you do this week?
- Day 1: Full session with one round only. Note plank times and whether the lower back stayed down on dead bugs.
- Day 3: Two rounds if day 1 felt fine. Log one line: “Core 2 rnd, plank 25 s, dead bug 8/side.”
- Day 5 or 6: Third session, or walk and skip if DOMS is sharp.
- Next week: Add two reps to bridges or five seconds to planks, not both at once.
The simple workout tracker pattern works for marking “core” on strength days. If you use revns, log a Calisthenics workout session or add these moves to any strength session alongside your other metrics.
When should you see a professional?
Stop and get individual advice for:
- Sharp low-back or pelvic pain during dead bugs or bridges, not mild muscle burn.
- Numbness or tingling down a leg when you lift the leg in bird dog or dead bug.
- Chest pain, fainting or unusual shortness of breath during holds.
- Pelvic floor symptoms (leaking, heaviness) that worsen with bracing — a pelvic health physiotherapist can adapt core work.
- Pain that worsens week after week despite easier variations.
Pregnant people and anyone in the first months after childbirth should follow clinician or midwife guidance on prone and supine core work before long planks or flat-on-back drills.
This is general training guidance, not medical advice.
Related
- 10 minute ab workout at home: a timed beginner routine on a mat
- Strength training for beginners: a simple plan for the first eight weeks
- Calisthenics for beginners: push-up to pull-up progressions at home
- Rest days: how many you need and what to do on them
- Mobility in ten minutes a day: a simple daily routine
- Simple workout tracker: log a day in ten seconds
- Exercise library
Sources
- Bull FC et al. World Health Organization 2020 guidelines on physical activity and sedentary behaviour. Br J Sports Med 2020
- American College of Sports Medicine. Progression models in resistance training for healthy adults. Med Sci Sports Exerc 2009
- Ainsworth BE et al. 2024 Adult Compendium of Physical Activities. Supplement to Medicine & Science in Sports & Exercise
Terms in this post
revns publishes training and nutrition guidance, not medical advice. See a clinician for symptoms, injury or a medical condition. Accurate as of November 18, 2026.